Wednesday, April 20, 2016

Fall 2013 - Spring 2016:

Okay, my apologies...I suck at keeping up with blogging.  I didn't think it had been 2 years, but I have had a couple busy work years, and a couple strong construction pushes, too.  Solar electricity was a huge push, adding a chimney and wood burning stove, and more recently starting to finish some of the interior with T&G paneling.  I'm not going to bother trying to remember dates, but I'll post some pictures and describe what's going on in them.

Here's the latest picture of the outside, with solar panels and chimney in place.

The chimney and woodstove were installed in late fall of 2014.  The first picture shows the hole I cut in the roof, which committed me to non-stop work that weekend to seal things up.  The chimney, from the stove to the top, is close to 30' long. 

The woodstove itself is identical to the one we had in our house in Grand Forks.  That house was destroyed in the 1997 flood (the 1979 flood didn't do it any favors, either), and I rescued the stove for use later.  I still have it, but it's not in good enough shape for anything more than a workshop.


The next few are showing the solar panel installation, which started in 2014, but was finalized by the fall of 2015.  I pulled them up by hand with a pulley system, letting them rest on the 2x4 ledge I put up beforehand.  The ladder you see hanging from the eaves was modified by adding some wheels so it would ride along the roof above the panels.


Prior to pulling the panels up, I screwed this 'feet' onto them, to rest on the poles that I had fastened onto the roof.  The roof isn't perfectly even, so the poles, mounted in only a few places along their length, evened out the panel mounting surface.


The cables for the panels were grouped and went into the roof through a conduit, then out the other side where they were collected into a 'combiner box', which is like a small fuse or breaker box.  From there only 2 power cords go back into the house, all the way down to the garage level.


In the garage, next to the standard household breaker box, is the conversion equipment for the solar power, along with the 'battery bank' that stores the electricity for use when the sun isn't shining.  The idea is to have enough storage capacity to run your house for a couple of days without sun (or wind when you add a wind generator to the system).  The conversion equipment consists of a charge controller,  and inverter.  The controller monitors input and output to keep the batteries from overcharging or becoming undercharged to the point of damage.  The inverter converts the DC (battery) current to AC (standard household current) so you can run standard appliances, lights, computers, lamps, fans, etc.  At this time, the solar electricity is fully operational, with no utility (grid) connection nor use of a generator.


Following are pictures of the paneling project, from purchase through the latest pictures of installation.  This is the first progress toward making this structure into an actual home.  My initial purchase was something like 2 tons of 6" x 5/8" x 12' light pine, beveled T&G paneling.  Loading it into the house was a 2-day process.


The last thing I have to add this time is that I finally bought a tower to mount a wind generator.  Before I could install it, I had to get the permit requirements changed in my county.  They were very outdated, and set up for very large, industrial units like you see in those huge wind farms.  They (the county board) were not actually aware of the permit details until I brought it to their attention.  It took a year and a half to get through planning and zoning, but now that it's reasonable, I plan to put mine into service this year.  I was considering a roof mount, or maybe something along the side of the house, but decided to pick up a tower.  Once again, Craigslist comes through.

P.S.  Among other pursuits that have taken some of my time over the last couple of years, is the truck project you see below.  It was a crew cab, long box originally, and I replaced the box with a 2-place snowmobile trailer.


Tuesday, December 31, 2013

Summer - Fall 2013

I had a little time this summer to get some things done, but then worked solidly from September up to Christmas.  I did enclose the stairway, as intended, and took measures to solve a problem that's been plaguing me for years - ice buildup on the garage floor.  Lastly, I repaired the damage done to one of my in-floor heating tubes that occurred during the 'mud-jack' of the garage floor awhile back.  Have you ever cut a 6" square hole through 4" of concrete?
 
Oh yes, and I reached a pivotal moment late this summer...a BBQ and poker night out there, where the whole gang crashed in the house.  This marked the first time anyone has actually slept (all night) in the house itself.  Here are some pictures of the enclosed stairway and BBQ.


Here are the pictures of the hole I had to cut, drill and chip out to get to the damaged in-floor heating tube.  I have pictures of the repair and new concrete somewhere, which I may add later.


And finally, the icing on the garage floor.  What happens, is that snow comes off the steep roof and piles right in front of the garage doors.  Since I'm not up there all the time to shovel right away, it can build up into quite a mound.  If the sun hits just right, some snow can melt off the roof and drip in front of the mound, which blocks it from draining properly, and it seeps under the garage door.  My plan was to dig a ditch along the entire length of the garage apron, then cover it with those steel drain grates like they use in the floor of the oil change places.  I found a decent deal on Craigslist and bought enough for the job, and also dug the ditch (12" wide x 18" deep x 56+' long) - by hand.  Digging the ditch took 3 or 4 hours per session, 4 or 5 sessions.  I didn't buy the wheelbarrow until halfway through the process, which helped tremendously.

Well, as it turned out, the steel grates weren't going to work, because I was told that pouring a concrete "u" shape wouldn't hold up.  I was convinced by the concrete guy to put down 'pea gravel' and drain tile, then cover it with more pea gravel.  Frankly, I'm not convinced it will work nearly as well as my original plan, but we'll see.  The real key is to get up there more often to do more shoveling and keep the snow from building up.  More easily said than done, but I'm making an effort this year because last year I could literally have skated around in the garage...no joke.  First picture is the grates that wouldn't work.  I resold them on Craigslist and broke even.


Thursday, July 4, 2013

July 4th, 2013 - Update Pictures


First I'll show you the ceiling fan lights I installed over the winter, but neglected to photograph until recently.  The first two shots are of the bathroom ceiling fan, one taken from the bathroom main level up into the vaulted ceiling area, the other taken from the entry to the loft above the bathroom as its construction has progressed so far.


Here is a shot from the bottom level showing the two ceiling fans in the main living area.


This is from the west loft bedroom showing one of the main room fans and the fan in the east loft.  The west loft has an identical setup.


The next two pictures are open-closed shots of the hidden ladder up to the bathroom loft.  That loft is big enough to section part off for bathroom storage as well as a small sleeping room for a low-maintenance guest.


And finally, the "Battery Bench", to complete the rear wall workbench space in the shop half of the garage.  The battery bank (6-8 deep cycle batteries) will rest on the grayish colored, lower shelf in the "L" portion of the bench.  The rest will be used for more storage and work space.  Note the geothermal tubing sneaking through, and the orange pex tubing which supplies the hot water for the in-floor radiant heat.  The pump for the radiant heat is tucked under the shelf where the battery bank will rest.


I'd list what I'm planning to do next, but it seems like I'm kind of attacking a number of things at one:  Landscaping (great big rocks) is kind of an ongoing fill-in task, plumbing is still a likely next project, whether I have the vanities and kitchen sink in or not, deep-cycle batteries and solar panels would be fun to start, and even some finished walls and a woodstove chimney might move up on the list.  I guess you'll just have to wait and see (same as me).

Wednesday, June 19, 2013

Early Summer 2013 - More electricity, A/C Fan mounting

I was working in the metro area through the end of May, so work on the house was restricted to weekends.  It was also the first good winter for snowmobiling in awhile, so many weekends through the winter were dedicated to that rather than house progress.  Those excuses aside, I did finish up my electricity - phase one, anyway.  I found out from the inspector that all the solar panel and wind generation equipment installation would require a separate permit.  Oh, and the permit - I failed my first attempt at my final electrical inspection, but was assured that almost all DIY'ers do.  There were a few minor details and easy fixes, but one of the main issues was the connection of the power source.  I had my gas generator connected to the breaker box, which is fine, but there needs to be a "transfer switch" in place, which I did not know.  The transfer switch is a safety measure for eliminating any exposed 'hot' terminals, and also keeps electricity from "back feeding" through the breaker box and into your solar panels or to the grid, if you're hooked into utility power.  Lastly, the GFI's and other safety breakers weren't tripping when the inspector was attempting to force them to short out with his testing equipment.  We assured the outlets were wired correctly, then discovered that my generator wasn't producing enough wattage at idle.  I had to manually increase the generator speed because this type of generator only increases when more load is required.  So now all of the minor details have been corrected, but I have yet to acquire a transfer switch, because the one I need will have to be incorporated into the solar/wind battery charge controller.  I figure I'll get all that equipment at once, then schedule my second final inspection - which I have a year to do.

Corrections from last entry:  #1:  I did end up going with rotary switches for the ceiling fans in the bathroom and the main living area, rather than remote control units.  The two in the main living area work from one switch, so they're always at the same speed.  The one in the bathroom has a rotary switch for the fan and a standard switch for the light.  The ones in the bedrooms change speeds by the pull-cord that comes standard with most ceiling fans.  The ceiling fan lights are all installed and working correctly, so I'll post pictures of them soon.  Correction #2:  I didn't start plumbing yet, but will soon.  I need to install bathroom vanities and (lower) kitchen cabinets before I can get to plumbing.  Also, one of the 'minor details' from the electricity is that the bathroom vanity lights need to be installed.  Correction #3:  The kitchen cabinet framing I had previous installed all had to come out - I'll find some pre-built cabinets.

So what I did do:  I improved the lower part of the garage entry stairway - widening it in preparation for adding finish flooring, a doorway and eventually enclosing the whole staircase.  See the before / after pictures below:
 

Next I decided to build a permanent mounting for the squirrel-cage fan I'm going to use for the 'poor man's' geothermal air conditioning.  In case you didn't read about it in the website pages, I decided to try an old farmstead trick of burying (the midsection of) a long piece of flexible plastic tubing, then drawing air through it.  The idea is that the air will cool underground as it flows through the tubing, providing a/c without the need of a compressor and condenser and all that equipment.  So, with the tubing in place, I needed the fan and fittings to route the cool air to the highest point in the house, because cool air 'falls'.  You'll have to go back to the website to see the pictures of the tubing making its way through the upstairs rafters, but the fan frame, which I incorporated into an extension of my workbench, is shown below:
 

Here it is shown with the removable shelf.

 
Next:  Pictures of the ceiling fans and the shelf I'm going to build for the battery bank.

Monday, November 5, 2012

Fall 2012: Lights, loft closets and bathroom loft

Having passed my electrical "rough-in", inspection, I was then allowed to connect all the outlets, switches, breakers and lights.  I connected my generator to the breaker box for electricity, and below you see an example of the end result:


Next we'll take a little tour around the inside (which I cleaned up considerably).  This will give me a chance to show the lights on in the various areas, as well as mention a few carpentry tasks I decided to tackle along the way.  First we have the main entryway, all lit up with overhead recessed lights.  Immediately after that I show the kitchen/dining area, which is on the opposite side of the main floor, and has similar lighting:


This next one is a shot into the 'sunken' bathroom, also utilizing recessed lighting, but with an added ceiling fan/light, which you can't see.  What you can see, to the right of the bathroom entrance, is what looks like a built-in ladder.  It looks like a built-in ladder because that's what it is, but it's a "ladder stairway".  It leads to the bathroom loft, and folds up into the wall, latching flush at the same angle as the rest of that wall.


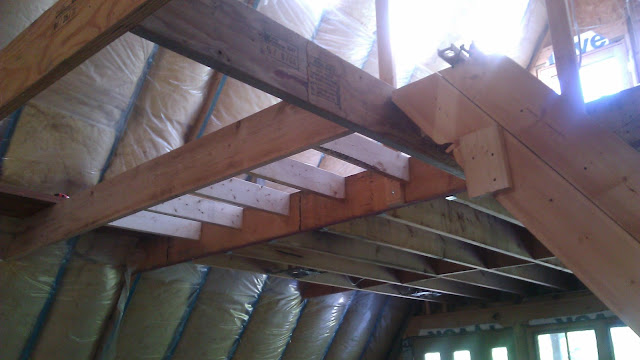
The next few pictures show a progression of how I decided to add closet space to the two loft bedrooms.  The first is from the bottom, and shows the floor joists just to the left of the top of the staircase.  Next you'll see those joists from the top, then the plywood covering the closet floor.  The last picture is from the bottom again, showing the closet studwalls, but also showing a light on in the peak of the ceiling.  That light was just added as a place-holder for testing the wiring, which I'll explain after these 4 pictures.


The loft bedrooms, as well as the main living space and the bathroom are all going to have ceiling fans with lights.  I don't have the ceiling fans yet, but needed the previously noted "place holders" until I found some fans.

The ceiling fans are important for circulating both warm and cool air, in keeping with the mindset of efficiency and off-grid type heating and cooling practices.  So there will be a total of (5) identical ceiling fans, which I found (new) on eBay for about $50 each, shipped.  Here's the picture from the eBay auction.  I should have them by mid-November.


The bedroom and bathroom fans will be operated with the pull cords you see in the picture, and the lights will be operated with a regular wall switch.  In the main living area, both sets of lights will be operated (together) with wall switches, which can be turned on at the top and bottom of both bedroom staircases (a confusing switch to wire for a DYI guy, but I managed to figure it out).  The fans will be operated (together) with a remote control, just like a TV or DVD player.  The peak of the ceiling in the main area is too high for pull cords, and I didn't like the idea of those knob switches, which are a hassle to wire and kind of expensive.  I found a set of (2) remote sets on eBay for about $20.

The ceiling fans are the last item I have to install before calling the electrical inspector back for the final inspection.  Along with all the indoor outlets, there are (3) outdoor grounded outlets, (4) sets of outdoor floodlights, (2) small balcony lamps, lights in the center of each half of the garage, as well as the required hard-wired smoke/carbon monoxide detectors.


My plan from the beginning was to make sure that even though this is an off-grid home, I didn't want switches to be in odd places, or have weird "rules" attached to outlets, as I've seen in a lot of my research.  I want people to be able to come in and turn on lights or plug in appliances just like the would in any other house.  That said, if I wanted to hook this place up to grid electricity, it wouldn't be a problem - and I may just do that someday, if I'm creating enough electricity to sell back to the electric company.


Next:  Plumbing!