Having passed my electrical "rough-in", inspection, I was then allowed to connect all the outlets, switches, breakers and lights. I connected my generator to the breaker box for electricity, and below you see an example of the end result:
Next we'll take a little tour around the inside (which I cleaned up considerably). This will give me a chance to show the lights on in the various areas, as well as mention a few carpentry tasks I decided to tackle along the way. First we have the main entryway, all lit up with overhead recessed lights. Immediately after that I show the kitchen/dining area, which is on the opposite side of the main floor, and has similar lighting:
This next one is a shot into the 'sunken' bathroom, also utilizing recessed lighting, but with an added ceiling fan/light, which you can't see. What you can see, to the right of the bathroom entrance, is what looks like a built-in ladder. It looks like a built-in ladder because that's what it is, but it's a "ladder stairway". It leads to the bathroom loft, and folds up into the wall, latching flush at the same angle as the rest of that wall.
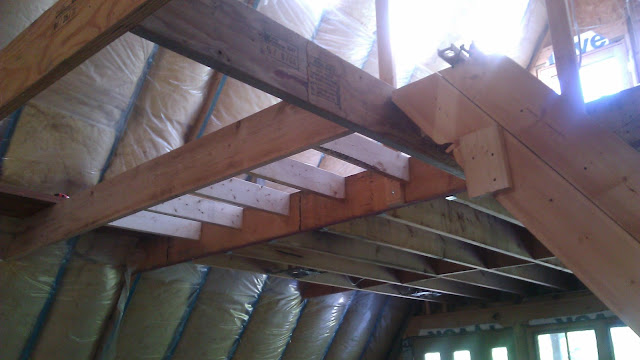
The next few pictures show a progression of how I decided to add closet space to the two loft bedrooms. The first is from the bottom, and shows the floor joists just to the left of the top of the staircase. Next you'll see those joists from the top, then the plywood covering the closet floor. The last picture is from the bottom again, showing the closet studwalls, but also showing a light on in the peak of the ceiling. That light was just added as a place-holder for testing the wiring, which I'll explain after these 4 pictures.
The loft bedrooms, as well as the main living space and the bathroom are all going to have ceiling fans with lights. I don't have the ceiling fans yet, but needed the previously noted "place holders" until I found some fans.
The ceiling fans are important for circulating both warm and cool air, in keeping with the mindset of efficiency and off-grid type heating and cooling practices. So there will be a total of (5) identical ceiling fans, which I found (new) on eBay for about $50 each, shipped. Here's the picture from the eBay auction. I should have them by mid-November.
The bedroom and bathroom fans will be operated with the pull cords you see in the picture, and the lights will be operated with a regular wall switch. In the main living area, both sets of lights will be operated (together) with wall switches, which can be turned on at the top and bottom of both bedroom staircases (a confusing switch to wire for a DYI guy, but I managed to figure it out). The fans will be operated (together) with a remote control, just like a TV or DVD player. The peak of the ceiling in the main area is too high for pull cords, and I didn't like the idea of those knob switches, which are a hassle to wire and kind of expensive. I found a set of (2) remote sets on eBay for about $20.
The ceiling fans are the last item I have to install before calling the electrical inspector back for the final inspection. Along with all the indoor outlets, there are (3) outdoor grounded outlets, (4) sets of outdoor floodlights, (2) small balcony lamps, lights in the center of each half of the garage, as well as the required hard-wired smoke/carbon monoxide detectors.
My plan from the beginning was to make sure that even though this is an off-grid home, I didn't want switches to be in odd places, or have weird "rules" attached to outlets, as I've seen in a lot of my research. I want people to be able to come in and turn on lights or plug in appliances just like the would in any other house. That said, if I wanted to hook this place up to grid electricity, it wouldn't be a problem - and I may just do that someday, if I'm creating enough electricity to sell back to the electric company.
Next: Plumbing!


